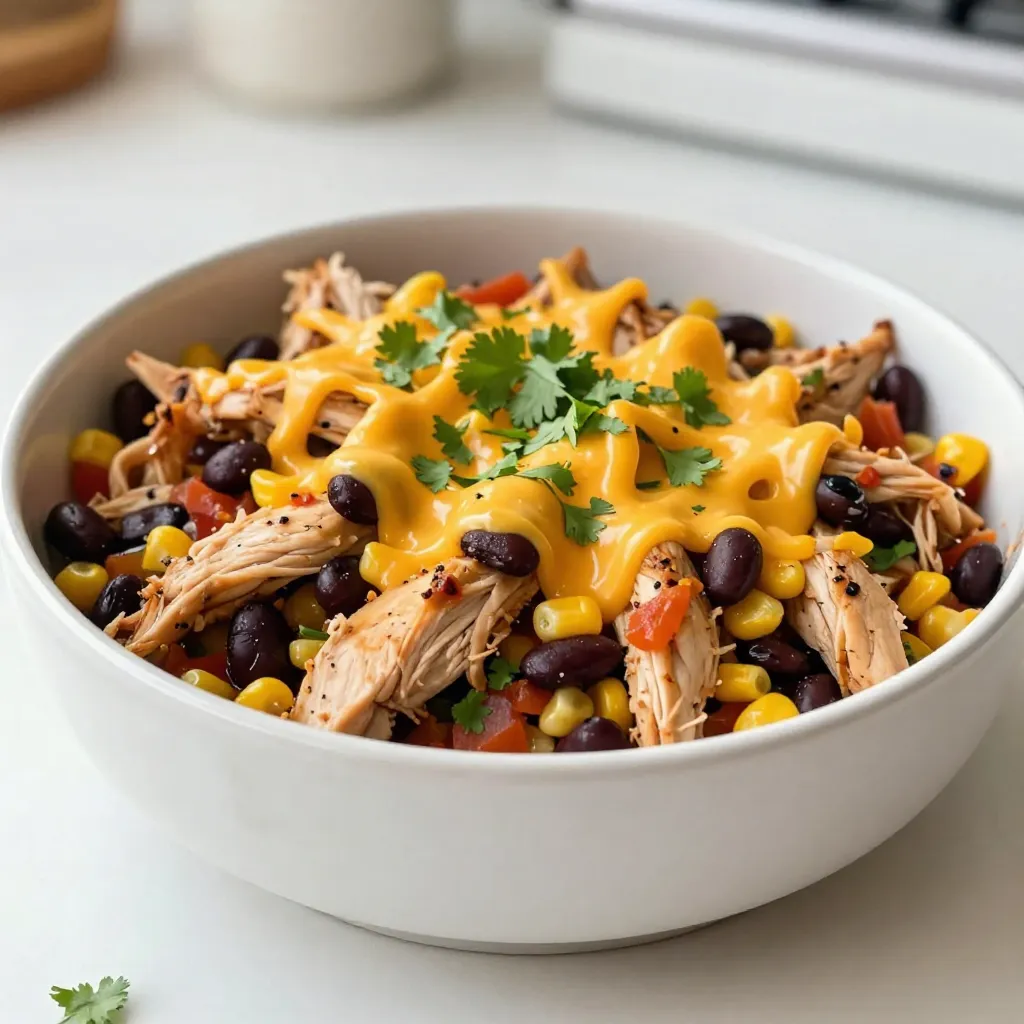
Are you ready to whip up a meal that’s both delicious and easy? Meet the Dump-and-Go Salsa Chicken! This lively dish is perfect for busy days when you want tasty food without the fuss. With just a handful of ingredients and a few simple steps, you can enjoy tender chicken simmered in zesty salsa. Let’s dive in and make cooking a breeze!
Why I Love This Recipe
- Easy Preparation: This recipe requires minimal prep time, making it perfect for busy weeknights.
- Flavorful Layers: The combination of salsa, beans, and spices creates a delicious flavor profile that everyone will love.
- Versatile Serving Options: Enjoy this dish in bowls, tortillas, or alongside rice, offering various meal choices.
- Cheesy Delight: The melted cheddar cheese on top adds a rich, creamy texture that enhances the overall dish.
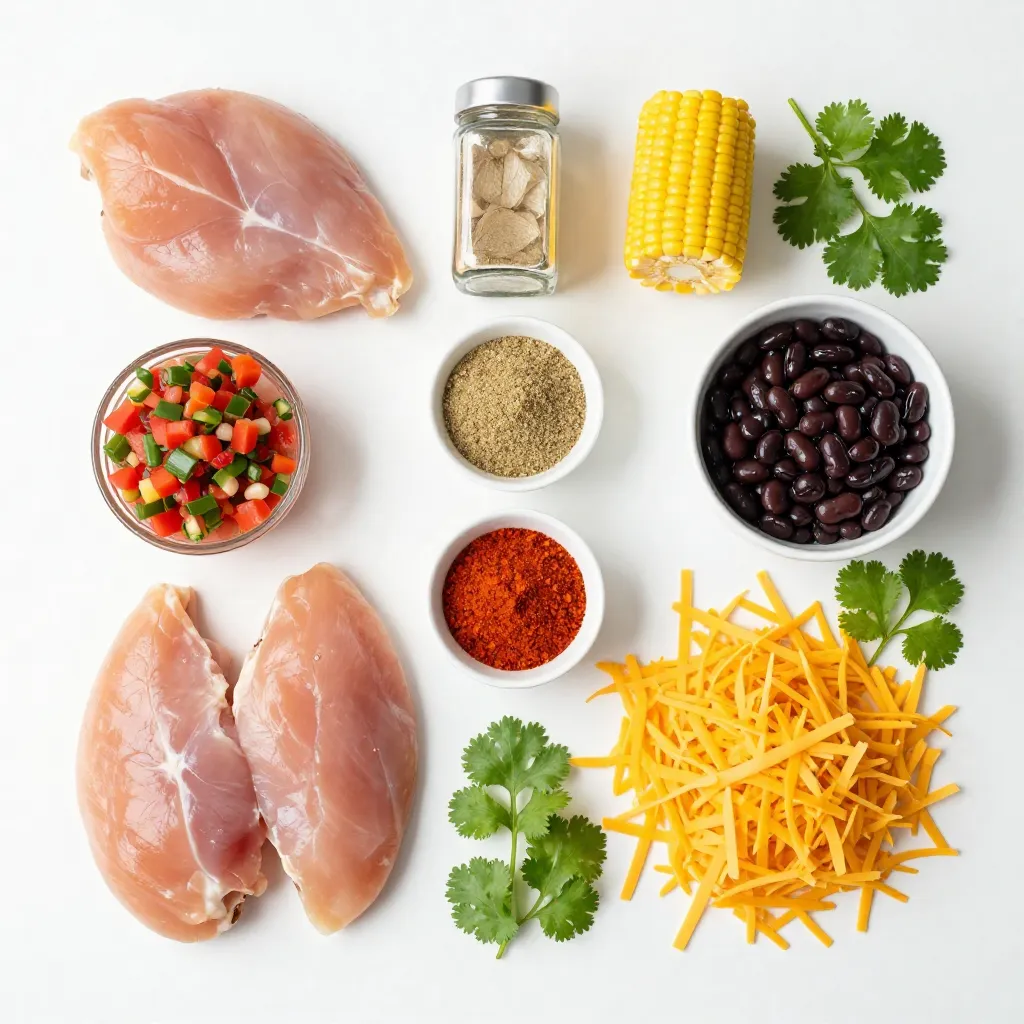
Ingredients
Main Ingredients List
– 4 boneless, skinless chicken breasts
– 1 cup of your favorite salsa
– 1 can black beans, rinsed and drained
– 1 cup corn (canned or frozen)
– 1 teaspoon ground cumin
– 1 teaspoon garlic powder
– 1 teaspoon onion powder
– ½ teaspoon chili powder
– 1 cup shredded cheddar cheese
– Fresh cilantro for garnish (optional)
– Salt and pepper to taste
For this Dump-and-Go Salsa Chicken, I use simple and fresh ingredients. The chicken provides protein, while the salsa adds a zesty kick. Black beans and corn bring texture and fiber, making the dish hearty and healthy. Spices like cumin and garlic powder enhance the flavor, while cheese adds creaminess.
Optional Ingredients for Customization
– Diced bell peppers for crunch
– Jalapeños for heat
– Avocado for creaminess
– Lime juice for brightness
– Sour cream as a topping
You can easily change this dish. Adding bell peppers makes it more colorful. If you love spice, toss in jalapeños. For a creamy touch, avocado works great. A splash of lime juice lifts the flavors. Top with sour cream for a rich finish.
Notes on Ingredient Substitutions
– Chicken thighs can replace chicken breasts for a richer taste.
– Use any type of salsa, like mango or verde.
– Swap black beans with pinto beans or chickpeas.
– For a dairy-free option, skip the cheese or use a dairy-free alternative.
Feel free to mix and match based on what you have at home. Cooking should be fun and flexible. These substitutions keep the dish easy and tasty. Enjoy creating your own version of this delicious salsa chicken!
Step-by-Step Instructions
Preparing the Chicken
Start by placing the chicken breasts in your slow cooker. Lay them flat and in one layer. Season each piece with salt, pepper, ground cumin, garlic powder, onion powder, and chili powder. This mix gives the chicken a tasty kick.
Layering the Ingredients
Next, pour your favorite salsa over the chicken. Make sure every piece is coated well. Then, take the rinsed black beans and corn. Scatter them on top of the salsa-covered chicken. Don’t stir yet; let the layers stay separate for now.
Cooking Instructions (Low/High Settings)
Cover the slow cooker with a lid. Choose your cooking time: low for 6 to 8 hours or high for 3 to 4 hours. Cooking on low lets the flavors meld nicely. The chicken should be tender and cooked through when done.
Shredding and Serving
Once cooked, grab two forks and shred the chicken right in the slow cooker. Mix it into the salsa, beans, and corn. Then, sprinkle shredded cheddar cheese over the top. Cover it again and wait 10 to 15 minutes for the cheese to melt. If you want, add fresh cilantro before serving. This dish is great in bowls, wrapped in tortillas, or next to rice or greens.
Tips & Tricks
How to Achieve Perfectly Tender Chicken
To make your chicken tender, use fresh or thawed chicken breasts. Avoid frozen ones. Season them well with salt, pepper, and spices for flavor. Cooking on low in the slow cooker helps keep the meat juicy. If you use high heat, keep an eye on the time. Shred the chicken right in the pot for the best results.
Seasoning Suggestions for Extra Flavor
You can mix and match spices to make this dish your own. Try adding smoked paprika for a deeper taste. If you love heat, add more chili powder. A squeeze of lime juice before serving can brighten up the flavors. You can also use taco seasoning instead of individual spices for ease.
Serving Ideas and Accompaniments
This salsa chicken is super versatile. Serve it in warm tortillas for tasty wraps. It’s great over rice or quinoa for a filling meal. Add a side of mixed greens or a fresh salad for crunch. You can even top it with avocado slices or sour cream for creaminess. Enjoy with friends and family for a fun meal!
Pro Tips
- Chicken Marinade: For extra flavor, marinate the chicken in salsa for a few hours or overnight before cooking.
- Bean Alternatives: Swap black beans for pinto or kidney beans to mix up the flavor profile.
- Spice Level: Adjust the heat by using a spicier salsa or adding diced jalapeños to the mix.
- Storage Tips: This dish stores well in the fridge for up to 4 days, making it great for meal prep!
Variations
Spicy Dump-and-Go Salsa Chicken
You can add some heat to your salsa chicken. Use a spicy salsa or add diced jalapeños. You can also mix in a pinch of cayenne pepper for more kick. Just remember, keep tasting as you go. This way, you can control the heat level. Spice lovers will enjoy this fiery twist!
Dump-and-Go Salsa Chicken with Veggies
Want to sneak in some veggies? Add diced bell peppers, chopped zucchini, or even spinach. Just toss them on top of the chicken before cooking. The slow cooker will soften them and add flavor. This variation makes your dish colorful and full of nutrients. It’s a great way to make it healthier and more filling!
Gluten-Free Options for Salsa Chicken
If you need a gluten-free meal, this recipe is perfect! All the main ingredients are gluten-free. Just pick a salsa that is labeled gluten-free. You can also serve it with rice or corn tortillas, which are usually gluten-free. This way, everyone can enjoy a tasty dinner without worry.
Storage Info
How to Store Leftovers
After your meal, let the salsa chicken cool down. Transfer the leftover chicken to an airtight container. Make sure to cover it well to keep it fresh. Store it in the fridge for up to four days. This dish is great for meal prep. You can enjoy it later in the week.
Reheating Instructions
To reheat the salsa chicken, use the microwave or a pot on the stove. If using the microwave, place a serving in a bowl and cover it. Heat it for one to two minutes, stirring halfway. On the stove, warm it on low heat. Stir it often until it is hot. This helps keep the chicken moist and tasty.
Freezing Tips for Future Meals
You can freeze the salsa chicken for later. Let it cool completely, then place it in a freezer-safe container. Label it with the date. It will keep in the freezer for up to three months. To thaw, move it to the fridge overnight. Reheat it as mentioned before. Enjoy a quick meal any day!
FAQs
Can I use frozen chicken breasts?
Yes, you can use frozen chicken breasts. Just make sure to increase the cooking time. If you use frozen chicken, cook it on high for about 4 to 5 hours. This will ensure the chicken cooks all the way through. I find that frozen chicken works well, but fresh chicken gives the best texture.
What type of salsa is best for this recipe?
I love using a medium salsa for this dish. It strikes a good balance of flavor and spice. You can choose salsa verde for a milder taste or a spicy salsa if you like heat. The choice of salsa can really change the dish. So, pick one that matches your mood or preference!
How can I make this dish dairy-free?
To make this dish dairy-free, simply skip the cheese. You can also use dairy-free cheese if you want that cheesy flavor. Nutritional yeast is a great option to add a cheesy taste without dairy. This way, you can still enjoy a flavorful meal without any dairy.
Can I cook this recipe in an Instant Pot instead?
Yes, you can use an Instant Pot. To do this, set it to the pressure cook setting for about 15 minutes. Make sure to add a little more liquid, like broth, to avoid burning. After cooking, let it naturally release pressure for about 10 minutes. This will keep the chicken juicy and tender.
This blog covered all you need to know for a great salsa chicken dish. We looked at the key ingredients and how to swap them out if needed. You learned step-by-step instructions for cooking. I shared tips for tender chicken and added flavor. You explored fun variations and how to store extras.
In the end, cooking can be simple and fun. Enjoy making this meal to fit your tast