Do you crave a sweet treat that’s quick and easy? Look no further! My no-bake peanut butter bars are simple to make, require no oven, and burst with flavor. With just a few ingredients, you can whip up a delicious snack that will satisfy your cravings. Join me as I share the steps and tips to create these tasty bars, plus some fun variations to make them your own!
Why I Love This Recipe
- Quick and Easy: This recipe requires minimal prep time and no baking, making it perfect for a last-minute treat.
- Healthy Ingredients: With peanut butter, oats, and honey, these bars are packed with wholesome ingredients that provide energy.
- Customizable: You can easily tweak the recipe by adding nuts, seeds, or using different types of chocolate to suit your taste.
- Deliciously Satisfying: The combination of peanut butter and chocolate is a match made in heaven, satisfying both sweet and savory cravings.
Ingredients
Main Ingredients for No-Bake Peanut Butter Bars
To make these tasty treats, you need a few main ingredients:
– 1 cup creamy peanut butter
– 1/2 cup honey or pure maple syrup
– 2 cups rolled oats
– 1/2 cup chocolate chips
– 1/2 teaspoon pure vanilla extract
– A pinch of salt
These ingredients work together to create a rich, sweet, and chewy bar. The peanut butter gives it a smooth texture. Honey or maple syrup adds natural sweetness. Rolled oats provide a hearty base, while chocolate chips make each bite fun.
Optional Ingredients for Extra Sweetness
If you want your bars to be sweeter, consider adding:
– 1/4 cup powdered sugar
This ingredient is not needed but can enhance the treat’s flavor. If you love sweet snacks, this is a great addition.
Ingredient Substitutions
You can easily swap some ingredients if you need to. For example:
– Use crunchy peanut butter instead of creamy for more texture.
– Replace honey with agave syrup for a vegan option.
– Use quick oats if you want a softer bite.
These swaps can help you fit the recipe to your taste or dietary needs. Enjoy creating your perfect no-bake peanut butter bars!

Step-by-Step Instructions
Preparation Steps for Peanut Butter Mixture
Start by taking a large mixing bowl. Add 1 cup of creamy peanut butter. Then, pour in 1/2 cup of honey or maple syrup. Use a sturdy spatula to mix them well. You want it smooth and without lumps. Next, add 2 cups of rolled oats and 1/2 cup of chocolate chips. If you like it sweeter, add 1/4 cup of powdered sugar. Don’t forget a pinch of salt and 1/2 teaspoon of vanilla extract. Mix everything until you see a thick, sticky dough.
How to Assemble and Pack the Bars
Now, grab an 8×8 inch square baking dish. Line it with parchment paper. Make sure the paper hangs over the sides. This helps with easy removal later. Take your peanut butter mixture and transfer it into the dish. Use your hands or a spatula to press it down firmly. Make the top smooth and even. Packing it tightly helps the bars hold together.
Chilling and Setting Time
Place the dish in the refrigerator and let it chill for at least 2 hours. If you need them faster, you can freeze them for about 30 to 45 minutes. This helps the bars set properly. After they are firm, lift them out using the parchment paper. Use a cutting board to slice them into bars or squares. Enjoy your tasty treats!
Tips & Tricks
Common Mistakes to Avoid
When making no-bake peanut butter bars, watch out for a few common mistakes. First, don’t skip the chilling time. If you don’t chill the bars long enough, they may fall apart. Also, make sure to mix the peanut butter and honey well. Lumps can make the bars uneven. Lastly, don’t use too much powdered sugar. It can make the bars overly sweet and sticky.
How to Achieve the Perfect Texture
To get the best texture, use creamy peanut butter. It blends smoothly with honey and oats. If you want a firmer bar, add a bit more oats. This will help the bars hold their shape. Press the mixture firmly into your baking dish. A tight pack will give you a denser and chewier bar.
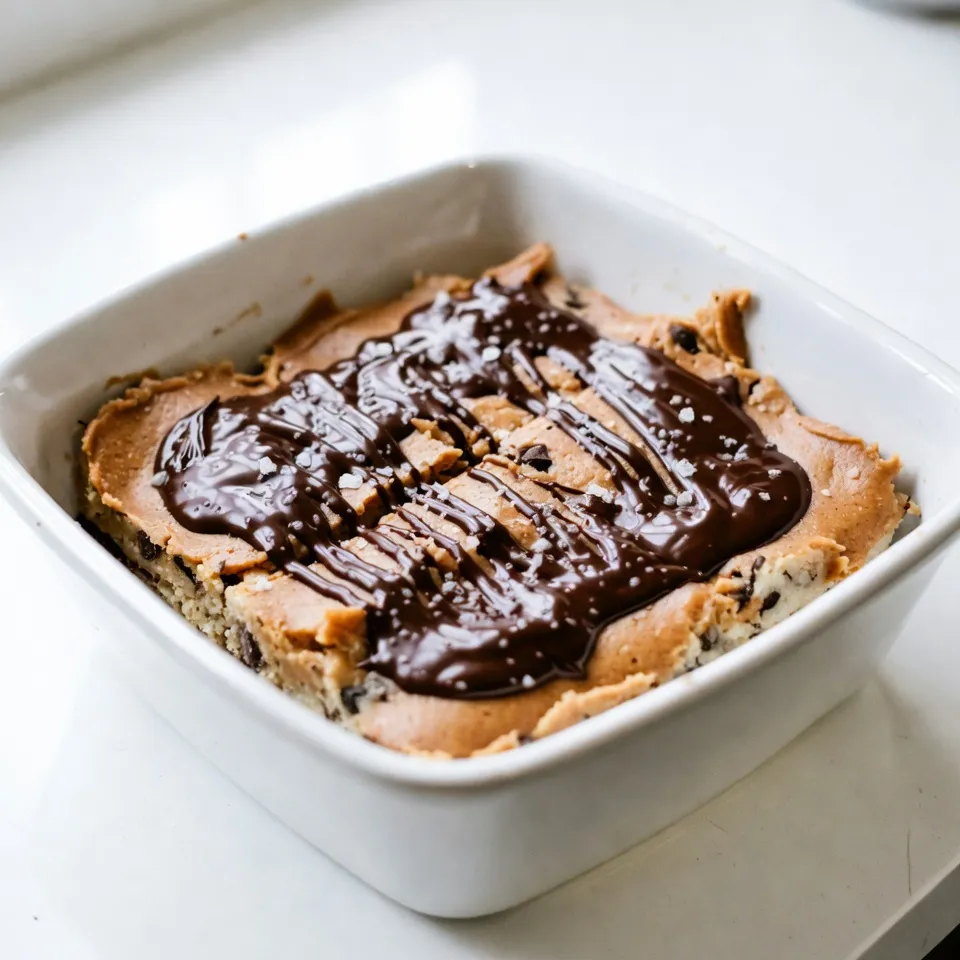
Presentation Tips for Serving
For a nice touch, drizzle melted chocolate over the bars. This adds flavor and makes them look fancy. Sprinkle a little flaky sea salt on top to enhance the taste. Serve the bars on a wooden board or a nice plate. This makes your dessert inviting and fun to enjoy.
Pro Tips
- Use Natural Sweeteners: Opt for raw honey or pure maple syrup to enhance the flavor profile while keeping the bars healthy.
- Texture Variations: Add chopped nuts or seeds for extra crunch and nutritional value, making your bars even more satisfying.
- Chill for Best Results: Allow the bars to set in the refrigerator overnight for a firmer texture that holds together better when cut.
- Flavor Enhancements: Experiment with add-ins like cocoa powder, cinnamon, or even a pinch of espresso powder to elevate the taste experience.
Variations
Peanut Butter Bar Flavor Variations
You can change the flavor of your no-bake peanut butter bars easily. Try adding cocoa powder for a chocolate twist. Just mix in 1/4 cup of unsweetened cocoa with the dry ingredients. If you love coconut, stir in 1/2 cup of shredded coconut for a tropical vibe. You can also swap the peanut butter for almond or cashew butter. Each nut butter gives a different taste and texture.
Alternative Toppings and Add-ins
Toppings can elevate your bars. Try drizzling melted chocolate over the top for a rich finish. You can sprinkle chopped nuts or seeds for crunch. For sweetness, add mini marshmallows or dried fruit. You might enjoy a layer of yogurt on top too. Mixing in some chia seeds or flaxseeds boosts nutrition without changing the flavor much.
Dietary Alternatives (e.g., vegan, gluten-free)
If you need vegan options, use maple syrup instead of honey. Choose a vegan chocolate for topping. For gluten-free bars, ensure you use certified gluten-free oats. You can also use a nut-free butter, like sun butter, for nut allergies. These swaps keep your bars delicious while meeting dietary needs.
Storage Info
How to Store No-Bake Peanut Butter Bars
To keep your no-bake peanut butter bars fresh, place them in an airtight container. This keeps moisture out and helps maintain their texture. Store the container in the refrigerator. They will stay good for up to two weeks. You can also wrap individual bars in plastic wrap for easy grab-and-go snacks.
Freezing Tips for Long-Term Storage
If you want to save some bars for later, freezing them is a great option. Cut the bars into pieces and wrap each piece in plastic wrap. Then place them in a freezer-safe bag or container. They can last up to three months in the freezer. When you’re ready to eat, simply thaw them in the fridge overnight.
Best Practices for Maintaining Freshness
To keep your bars tasting great, avoid exposing them to heat or sunlight. Always store them in a cool, dry place. If you notice any changes in smell or texture, it’s best to toss them. Enjoy your tasty treats fresh for the best flavor!
FAQs
Can I use crunchy peanut butter instead of creamy?
Yes, you can use crunchy peanut butter. It adds a fun texture to the bars. The nuts give each bite a nice crunch. Just remember, the flavor stays the same, but the texture changes. If you like crunch, go for it!
How long do the bars last in the fridge?
These bars last up to two weeks in the fridge. Store them in an airtight container to keep them fresh. I recommend checking them every few days. If they start to look or smell off, it’s best to toss them.
Can I make these bars without honey or maple syrup?
Yes, you can make these bars without honey or maple syrup. Try using agave syrup, brown rice syrup, or even a sugar substitute. Just make sure to use a liquid sweetener. This keeps the bars moist and tasty!
No-bake peanut butter bars are simple and tasty treats. We covered the main and optional ingredients, plus easy swaps. I shared steps to mix, pack, and chill your bars perfectly. You learned tips to avoid mistakes and how to make them look great. Variations and storage advice help you customize and keep these snacks fresh.
In the end, you can enjoy these delicious bars your way. They are fun to make and shar